How to Customize Your Button Styles
Step 1
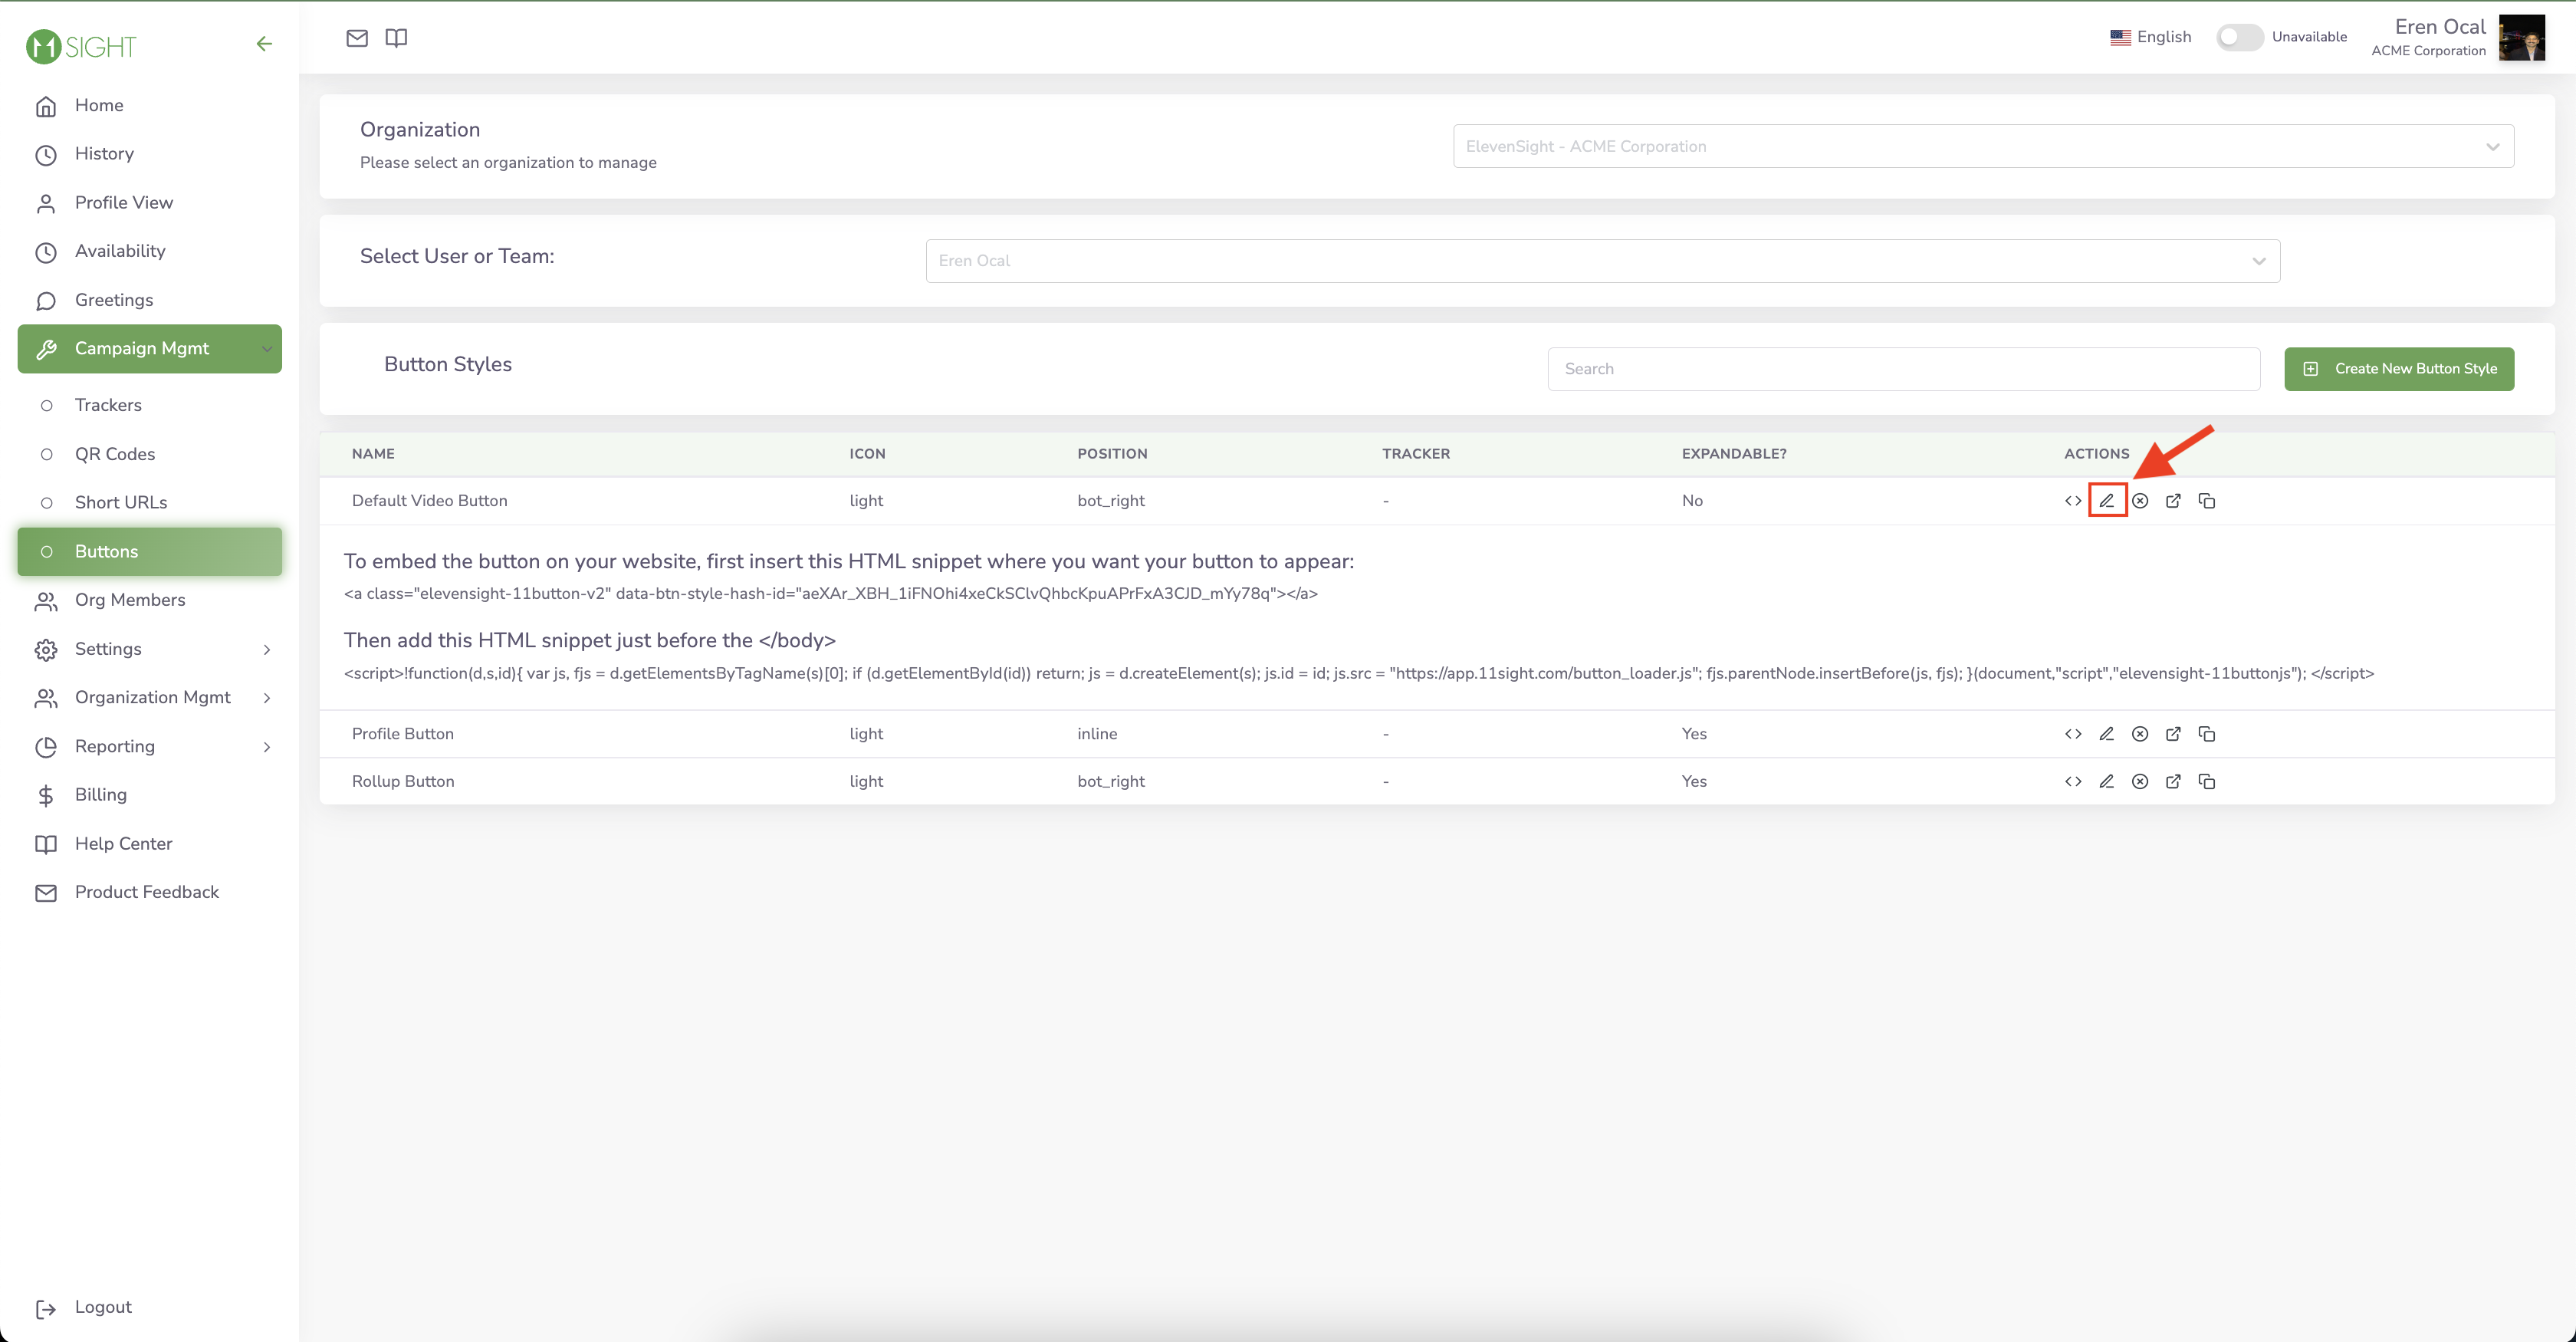
On the side menu, navigate to Campaign Management > Buttons.
Here you will see that by default three button styles were already created for you:
Default Video Button: This button directly starts a video call when clicked.
Profile Button: This is the button displayed on your profile page.
Rollup Button: When clicked, this button expands to display three different call types by default; video, audio and live chat.

Step 2
To create a new button from scratch, click “Create New Button Style”.
To edit an existing button click the “Edit icon” under ACTIONS. Be careful! If the button was implemented on a website, the changes will be applied automatically.
To copy an existing button with a new name click “Duplicate icon” under ACTIONS.
Step 3
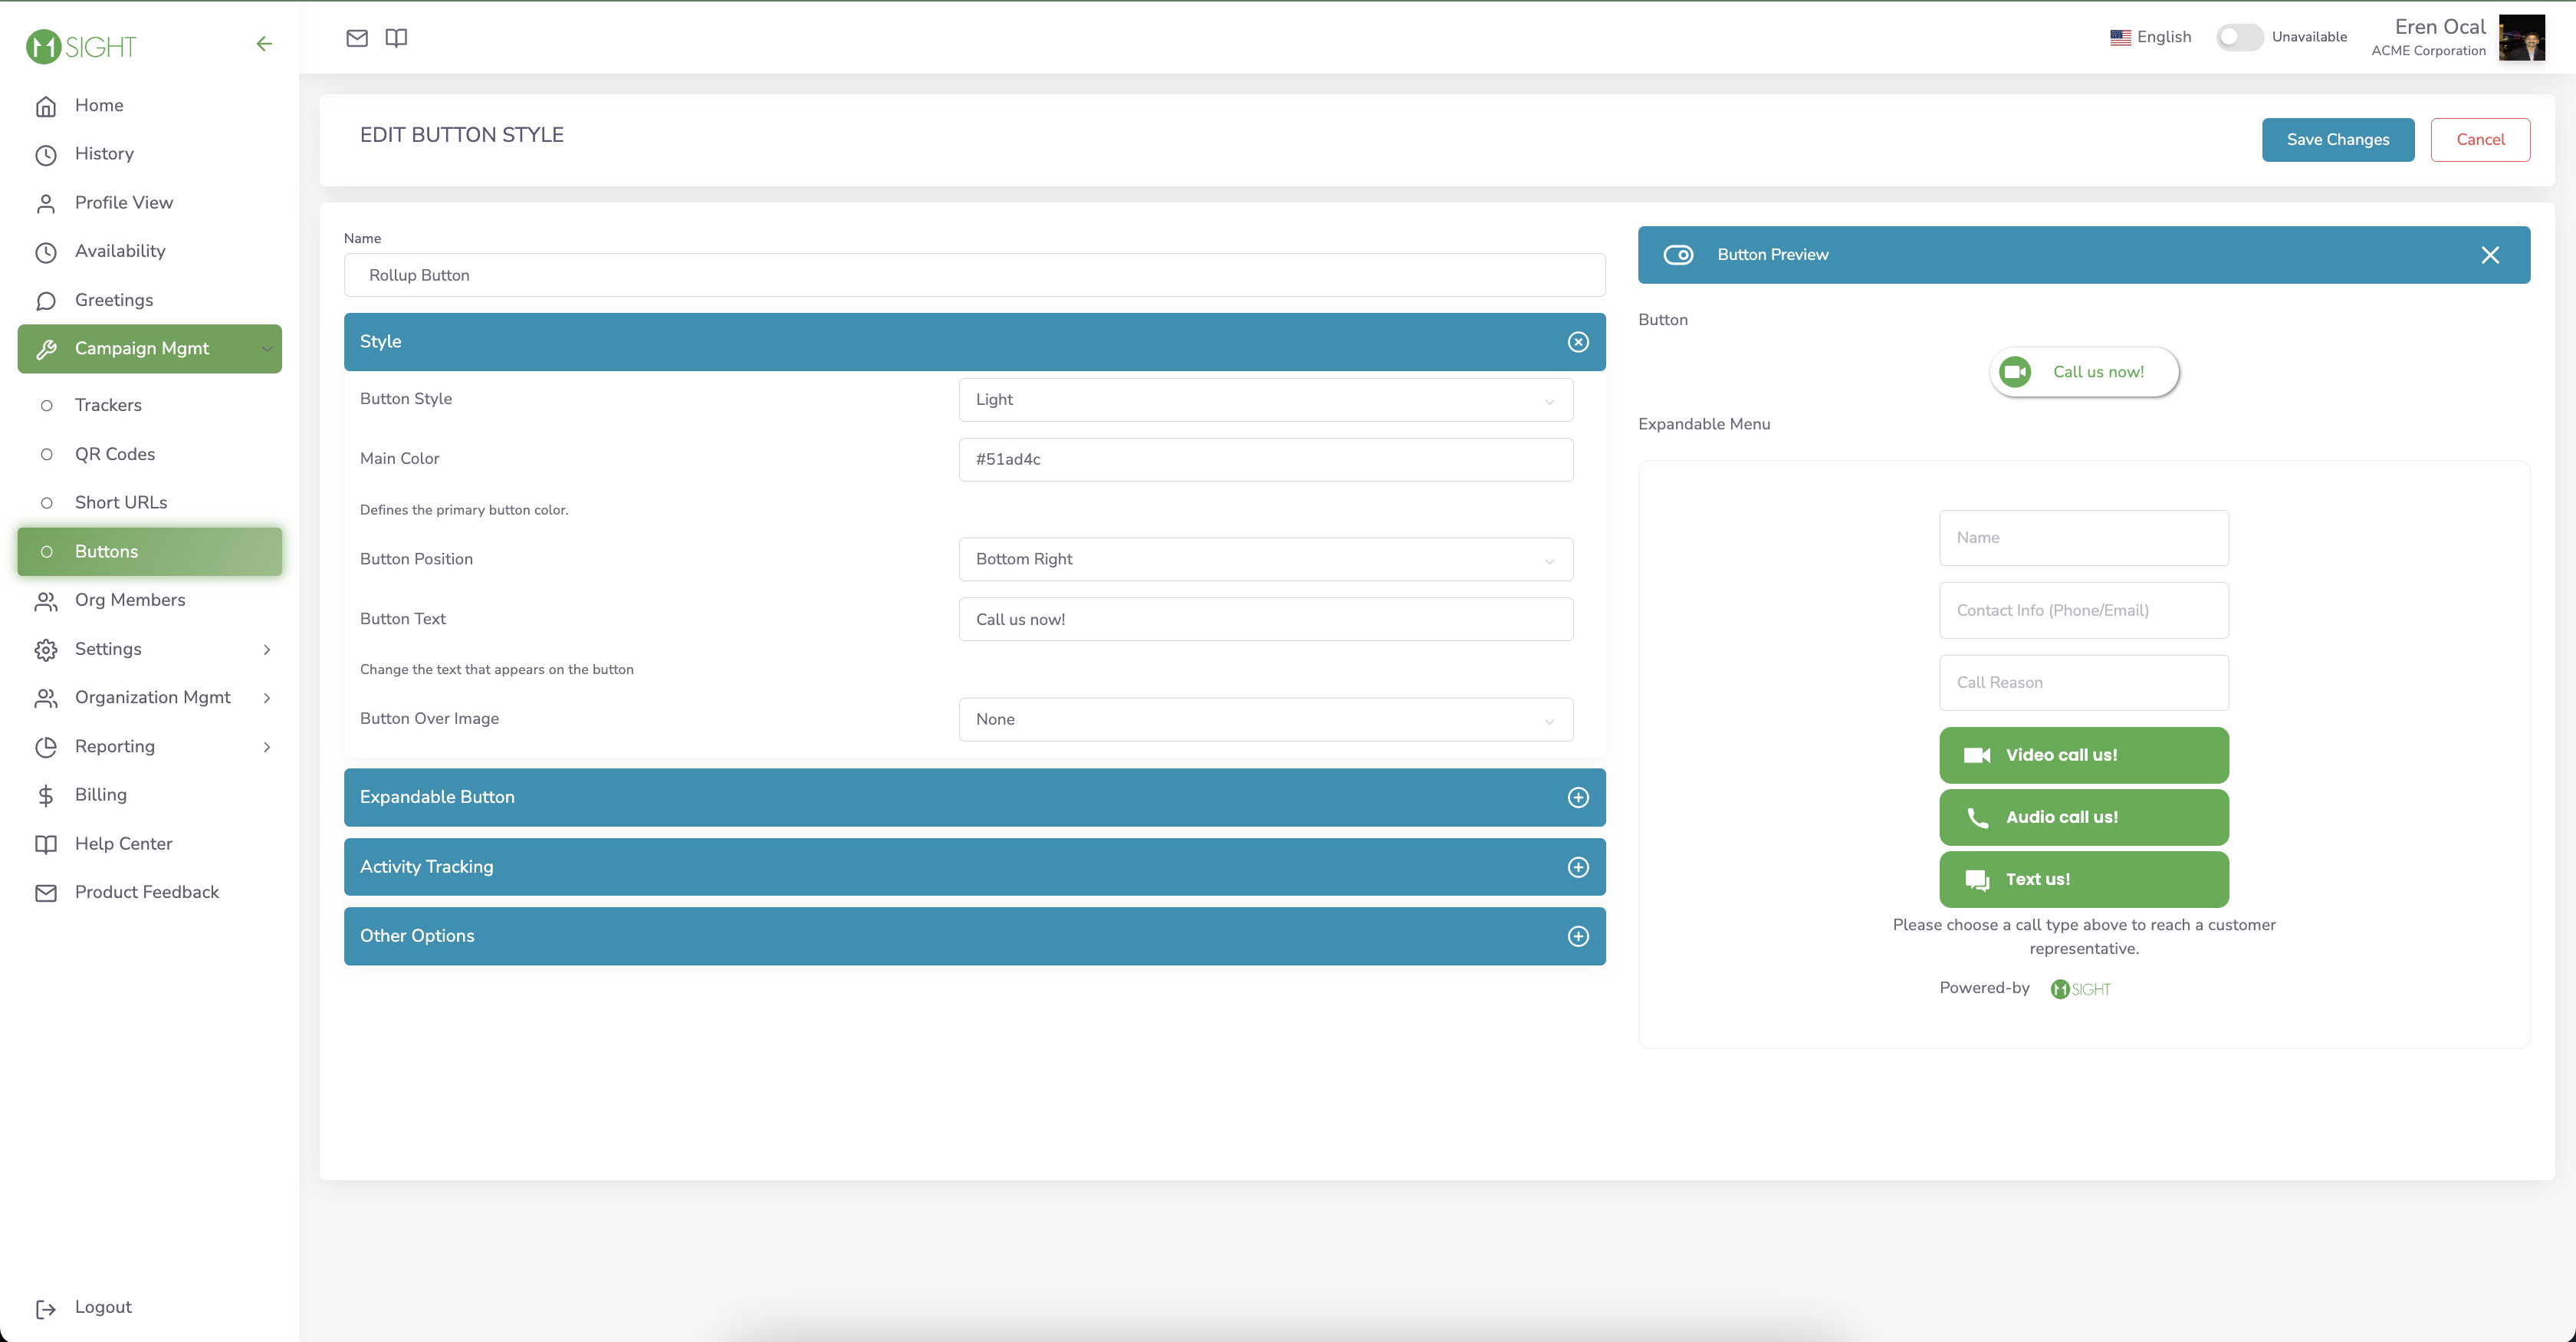
When creating or editing a button style, you will see your changes in real time in the Button Preview section on the right.
You can name your button in the “Name” field. Only you will be able to see it on your dashboard.
You can choose one of the five designs that we offer for your button in “Button Style” dropdown box and change the Main Color to match your button with your website’s color scheme.
You can decide where you want your button to appear on your website by selecting “Button Position“. Learn more about button positions.
The text displayed in the button can be set in “Icon Text” field.
And you can add an image to be displayed on top of your button by uploading it or selecting the default image in “Button Over Image” section.
Step 4
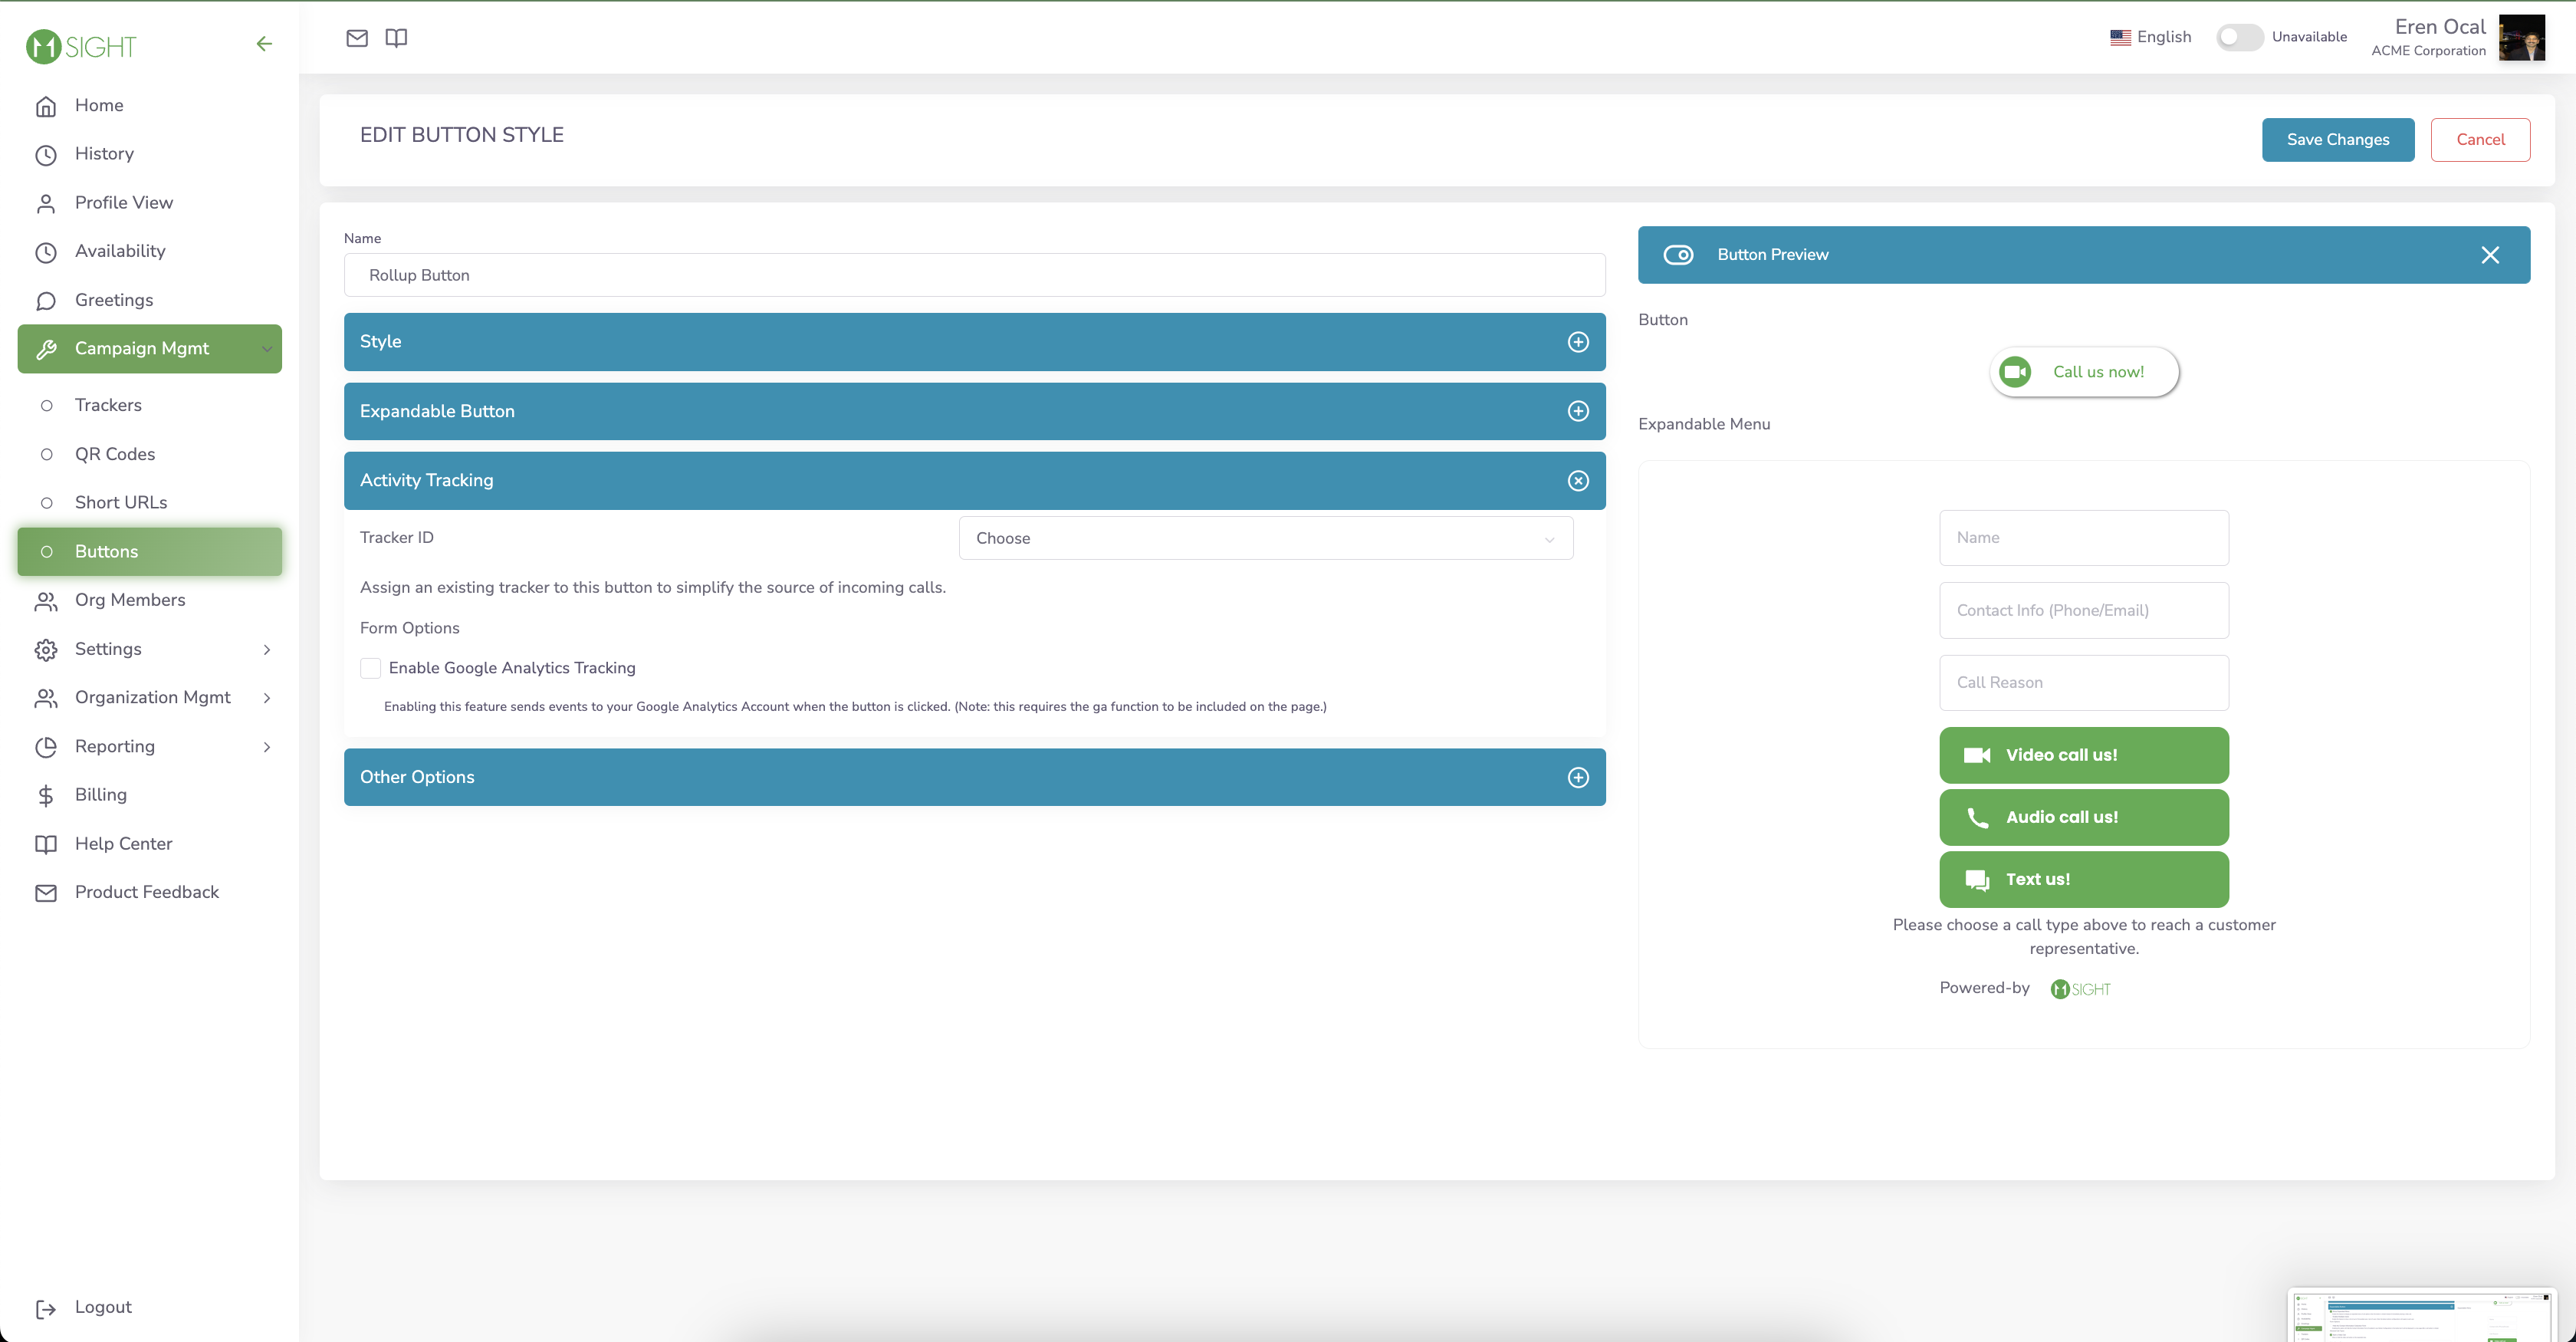
If you want to keep track of the origin of the incoming calls of a button, you can assign a tracker by selecting an existing one in “Tracker ID” dropdown box.
If you already have Google Analytics set up on your website, you can enable the events that we have by selecting “Enable GA Tracking“. The events you will start seeing are:
Roll up open (if it’s an expandable button)
Roll up close (if it’s an expandable button)
Video button click (if it’s an expandable button)
Audio button click (if it’s an expandable button)
Text button click (if it’s an expandable button)
Video call start (if it’s not an expandable button)
Department click (if it’s a multiple user button)
Go back to the department list (if it’s a multiple user button)
Button view
Step 5
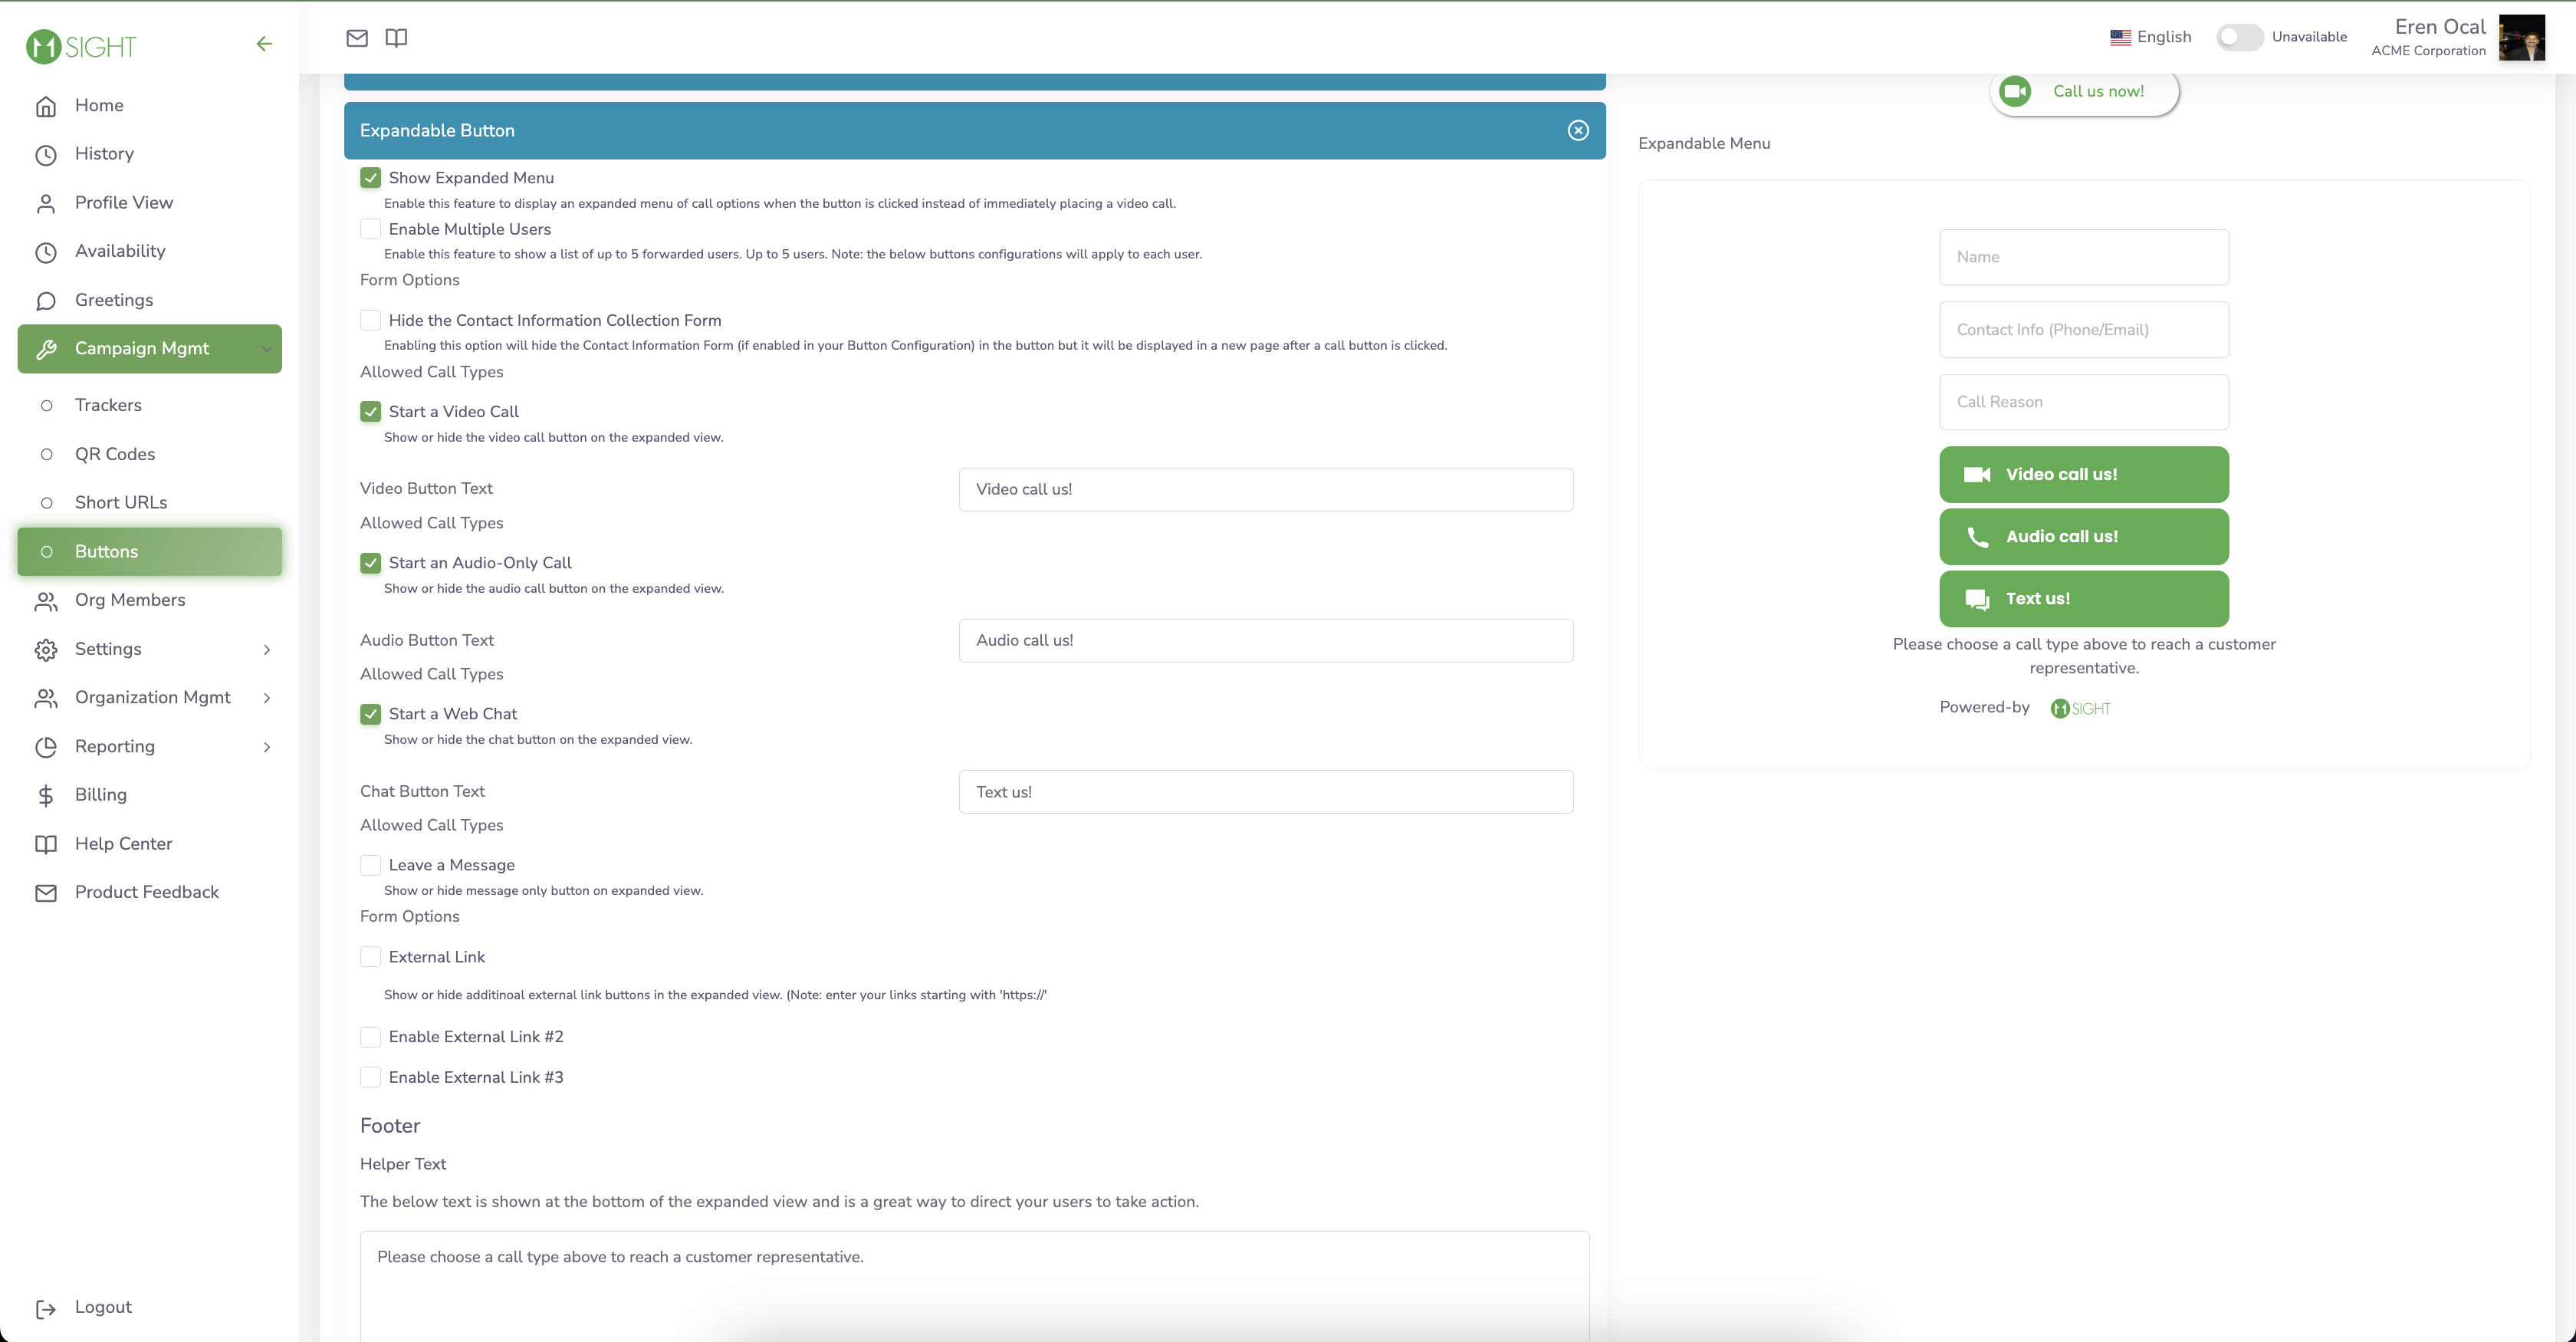
If you don’t want your button to expand and display the call types, you can disable it by unchecking the “Is Expandable” checkbox. It will start a video call by default.
Enabling Hide the Contact Information Form in the button will hide the form from the button. Callers will be asked to fill it out after choosing a call option.
Step 6
You can choose which call types to display and the texts for the buttons in the “Allowed Call Types” section.
You can add up to 3 External Links (i.e. scheduling tool or your cell number) as buttons.
You can edit the “Helper Text“, which is shown below the call types in the button.
Button Positions
In-line Buttons
In-line buttons will appear wherever their code is embedded on your html. You will need to place their code in every location you want them to appear individually.
If you are using the WP Plugin, all buttons including Inline buttons can be implemented on a specific page just by copying and pasting the short code into the page code. See more on embedding buttons here.
Other Positions
All the other positions will make the button appear in a fixed position on your website. When visitors are scrolling the button will remain in that position. You can place the codes for these buttons anywhere in your html, it will not affect the position they appear in.
Info: You can embed the code in your footer or header if you would like the button to appear on every page of your website. Otherwise, you can embed it on pages individually.
Possible fixed positions are:
Bottom Right
Bottom Left
Bottom Center
Top Right
Top left