How to Embed e-buttons on Your Website
Step 1
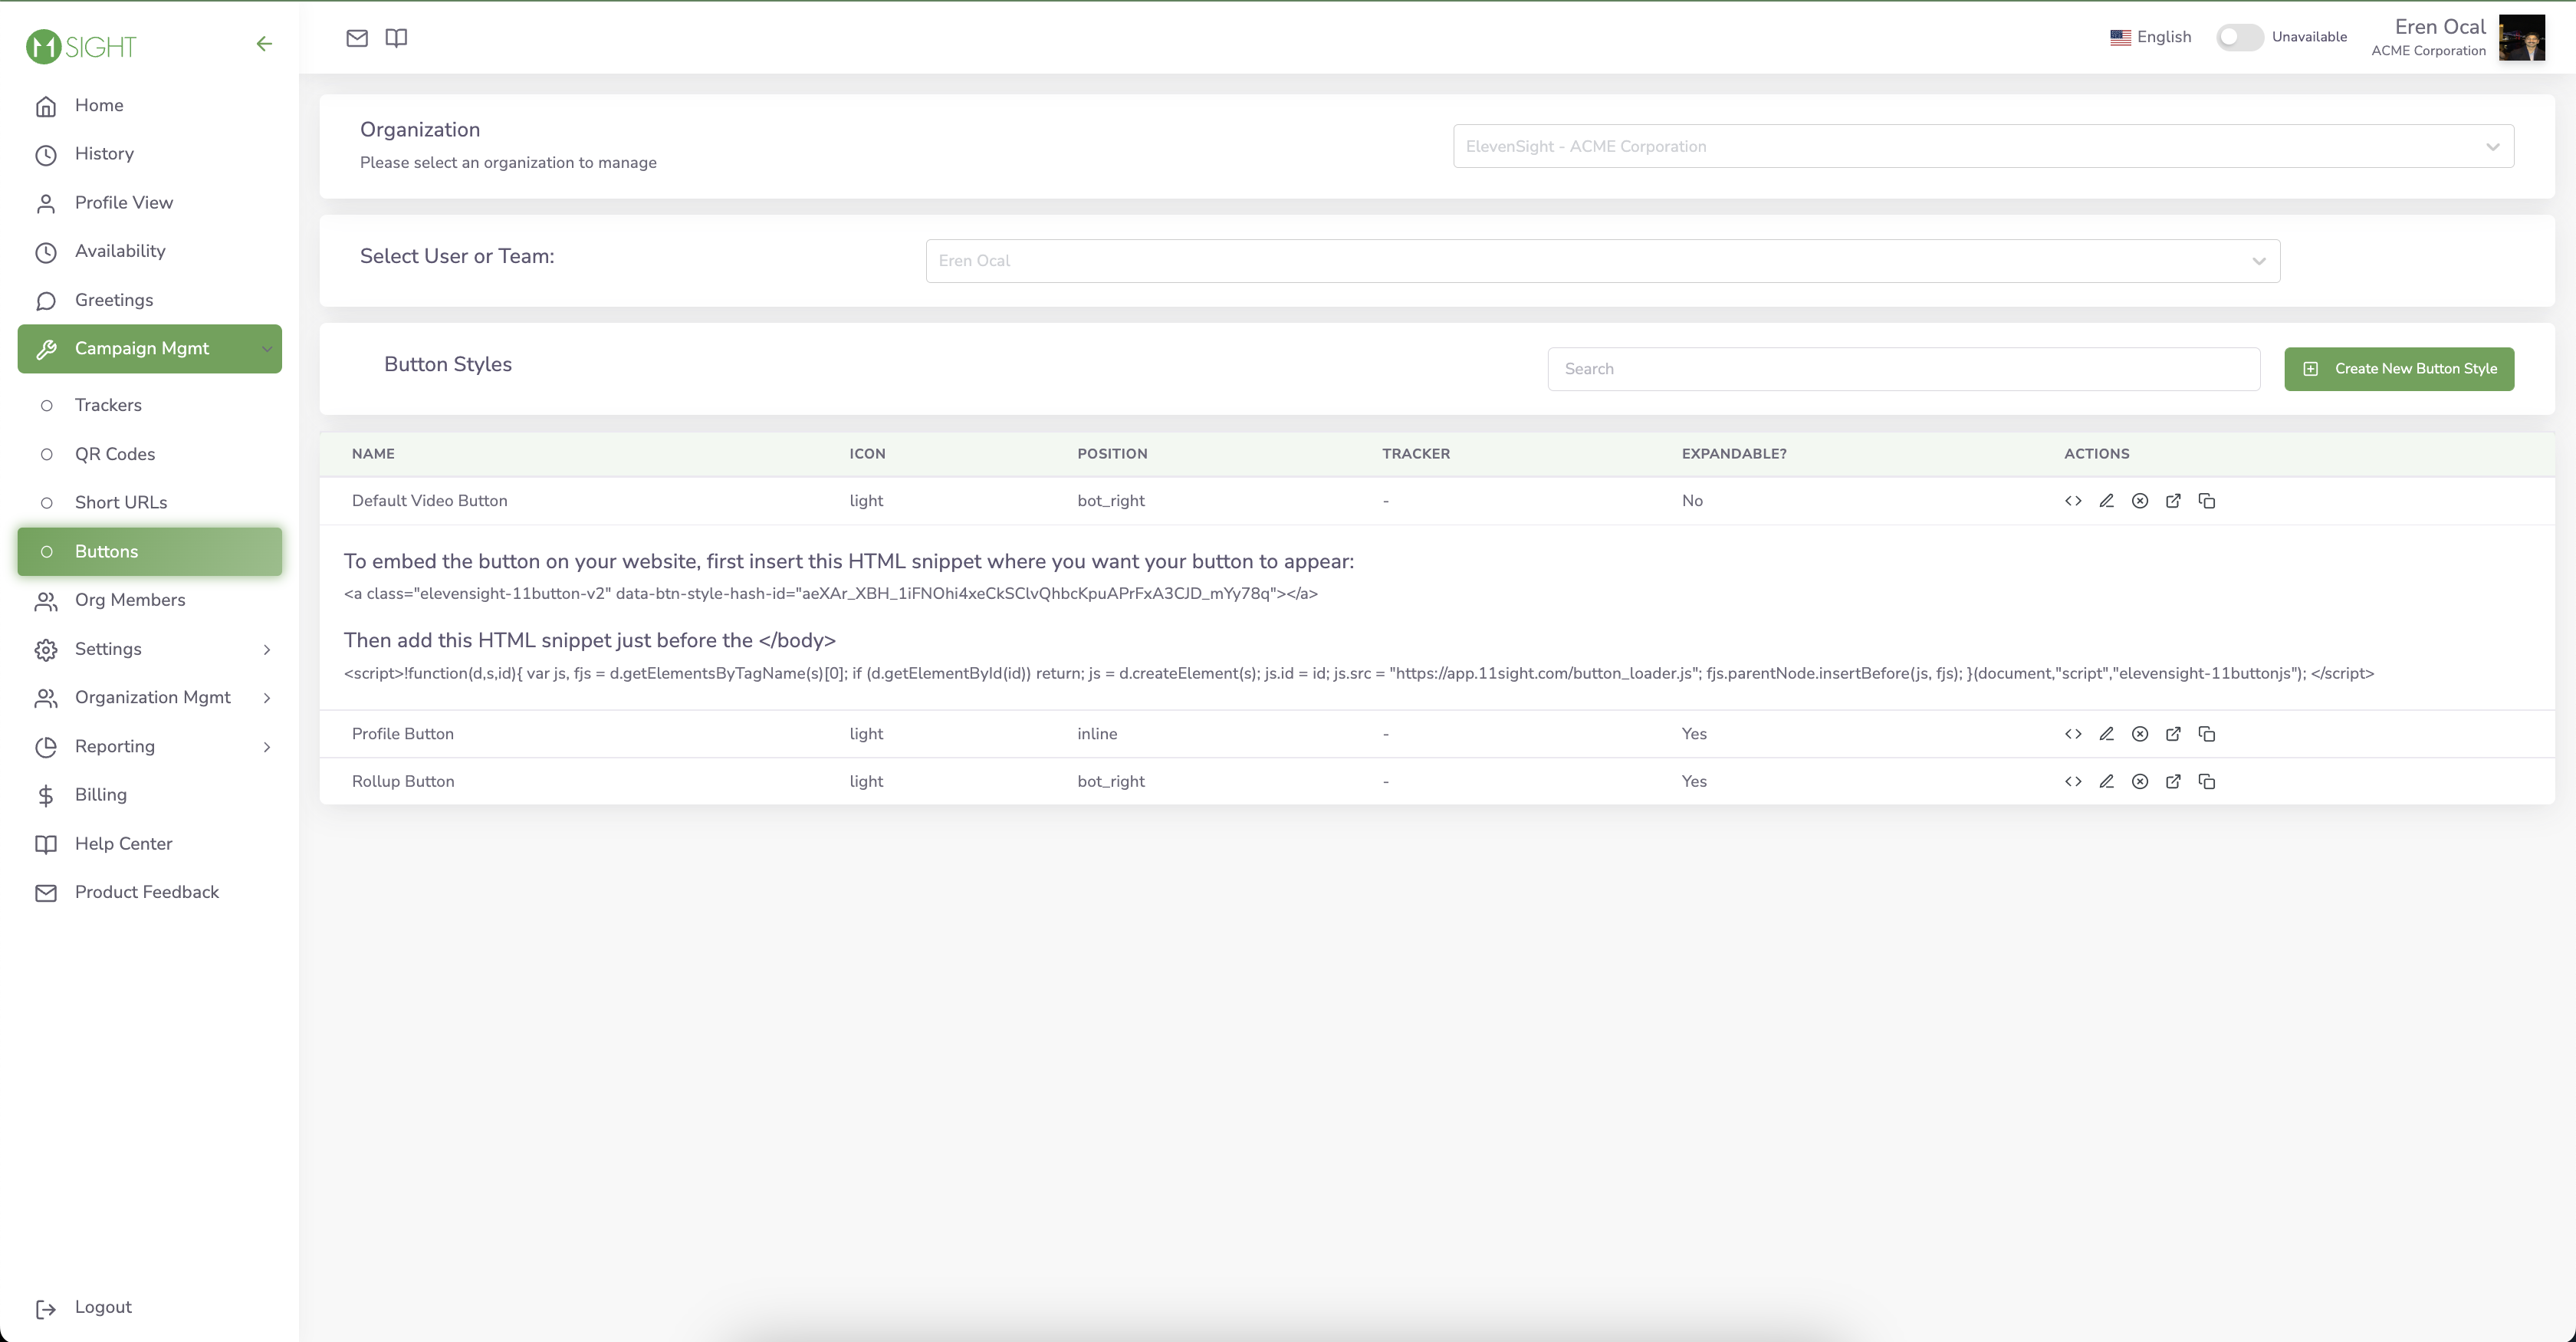
On the side menu, navigate to Campaign Management > Buttons.
Step 2
Click on the brackets for the button you would like to embed and the code will expand.
If you have a web developer, copy the two pieces of the code and send it to them asking them to add the code to your website.
If you manage your own website, go to the section below.
Step 3
Publish your changes
Now, visitors to your website will be able to start an 11Sight call with you in just one click.

If you manage your own website
If you manage your website yourself, first copy the script on the top and add it to the end of your page’s html source, just before the < / body > tag. Then, copy the html element and insert it into your page where you want your button to appear.
If your website is built on WordPress, you can use our WP Plugin.
Step 1
Go to WordPress Plugin Store and download 11Sight plugin.
Upload the downloaded file to your WordPress dashboard.
Alternatively, you can go to your WordPress dashboard and go to “Add Plugins”, search for 11Sight and directly install it.
Step 2
Go to 11Sight Options on your WordPress dashboard left menu.
Login by entering your 11Sight account credentials.
If you don’t already have an account, you can create one by following the link on the login page.

Step 3
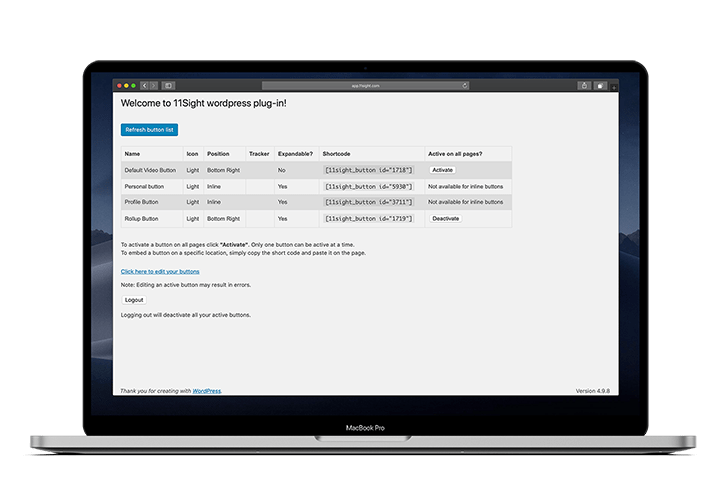
After logging in, you will see your existing buttons.
You can edit these buttons by clicking the link on the page and refresh the button list by clicking “Refresh button list” button.
Fixed position buttons can be activated by just clicking “Activate” button. Your button will be shown on every page of your website.
All buttons including Inline buttons can also be implemented on a specific page just by copying and pasting the short code into the page code.