How to Set Up Team Lines
Team Lines:
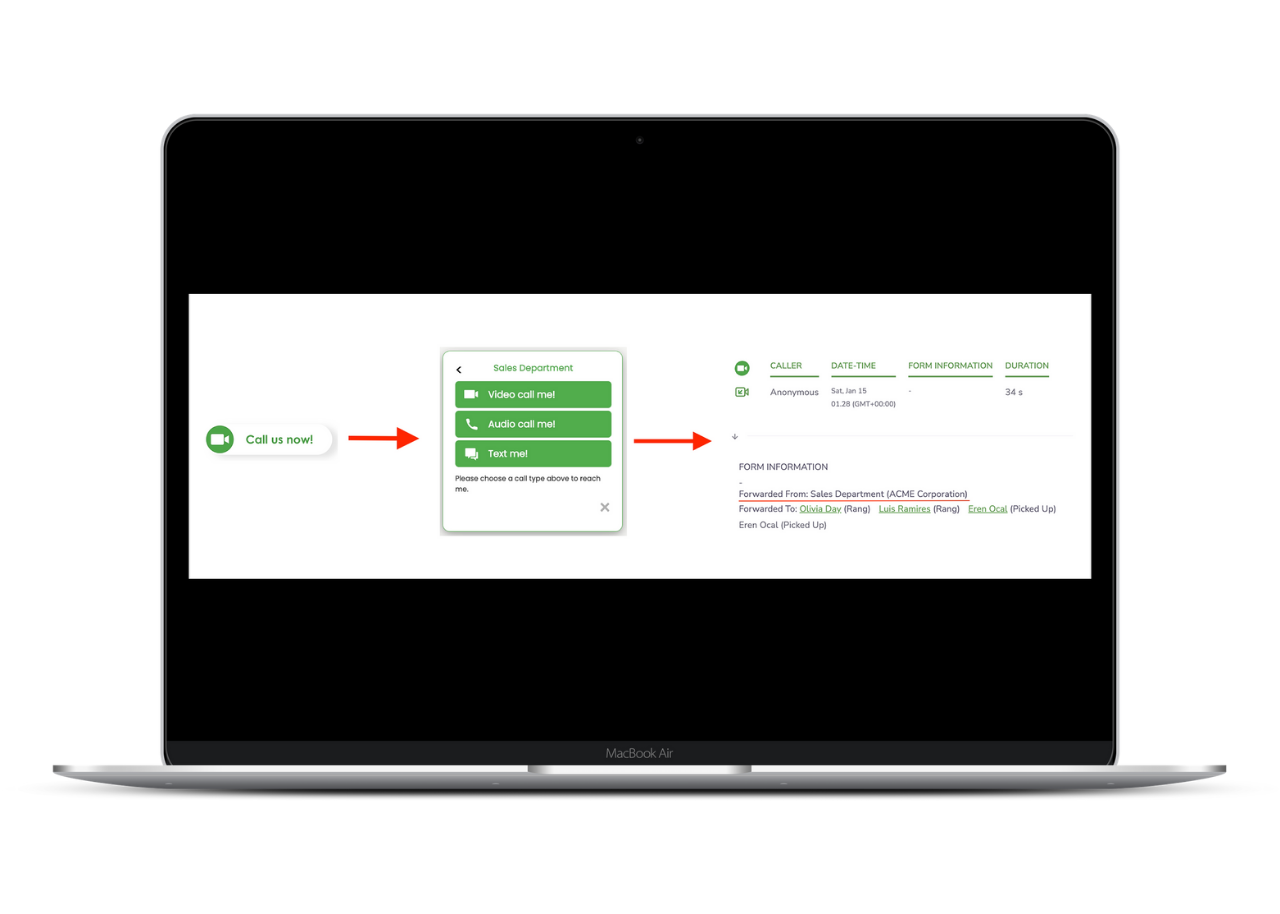
Calls multiple users at the same time
Looks like a user button to the end user.
Can expand to allow a caller to choose video, audio, or chat.
A team line can be forwarded to multiple users.
A team line can be escalated to multiple users.
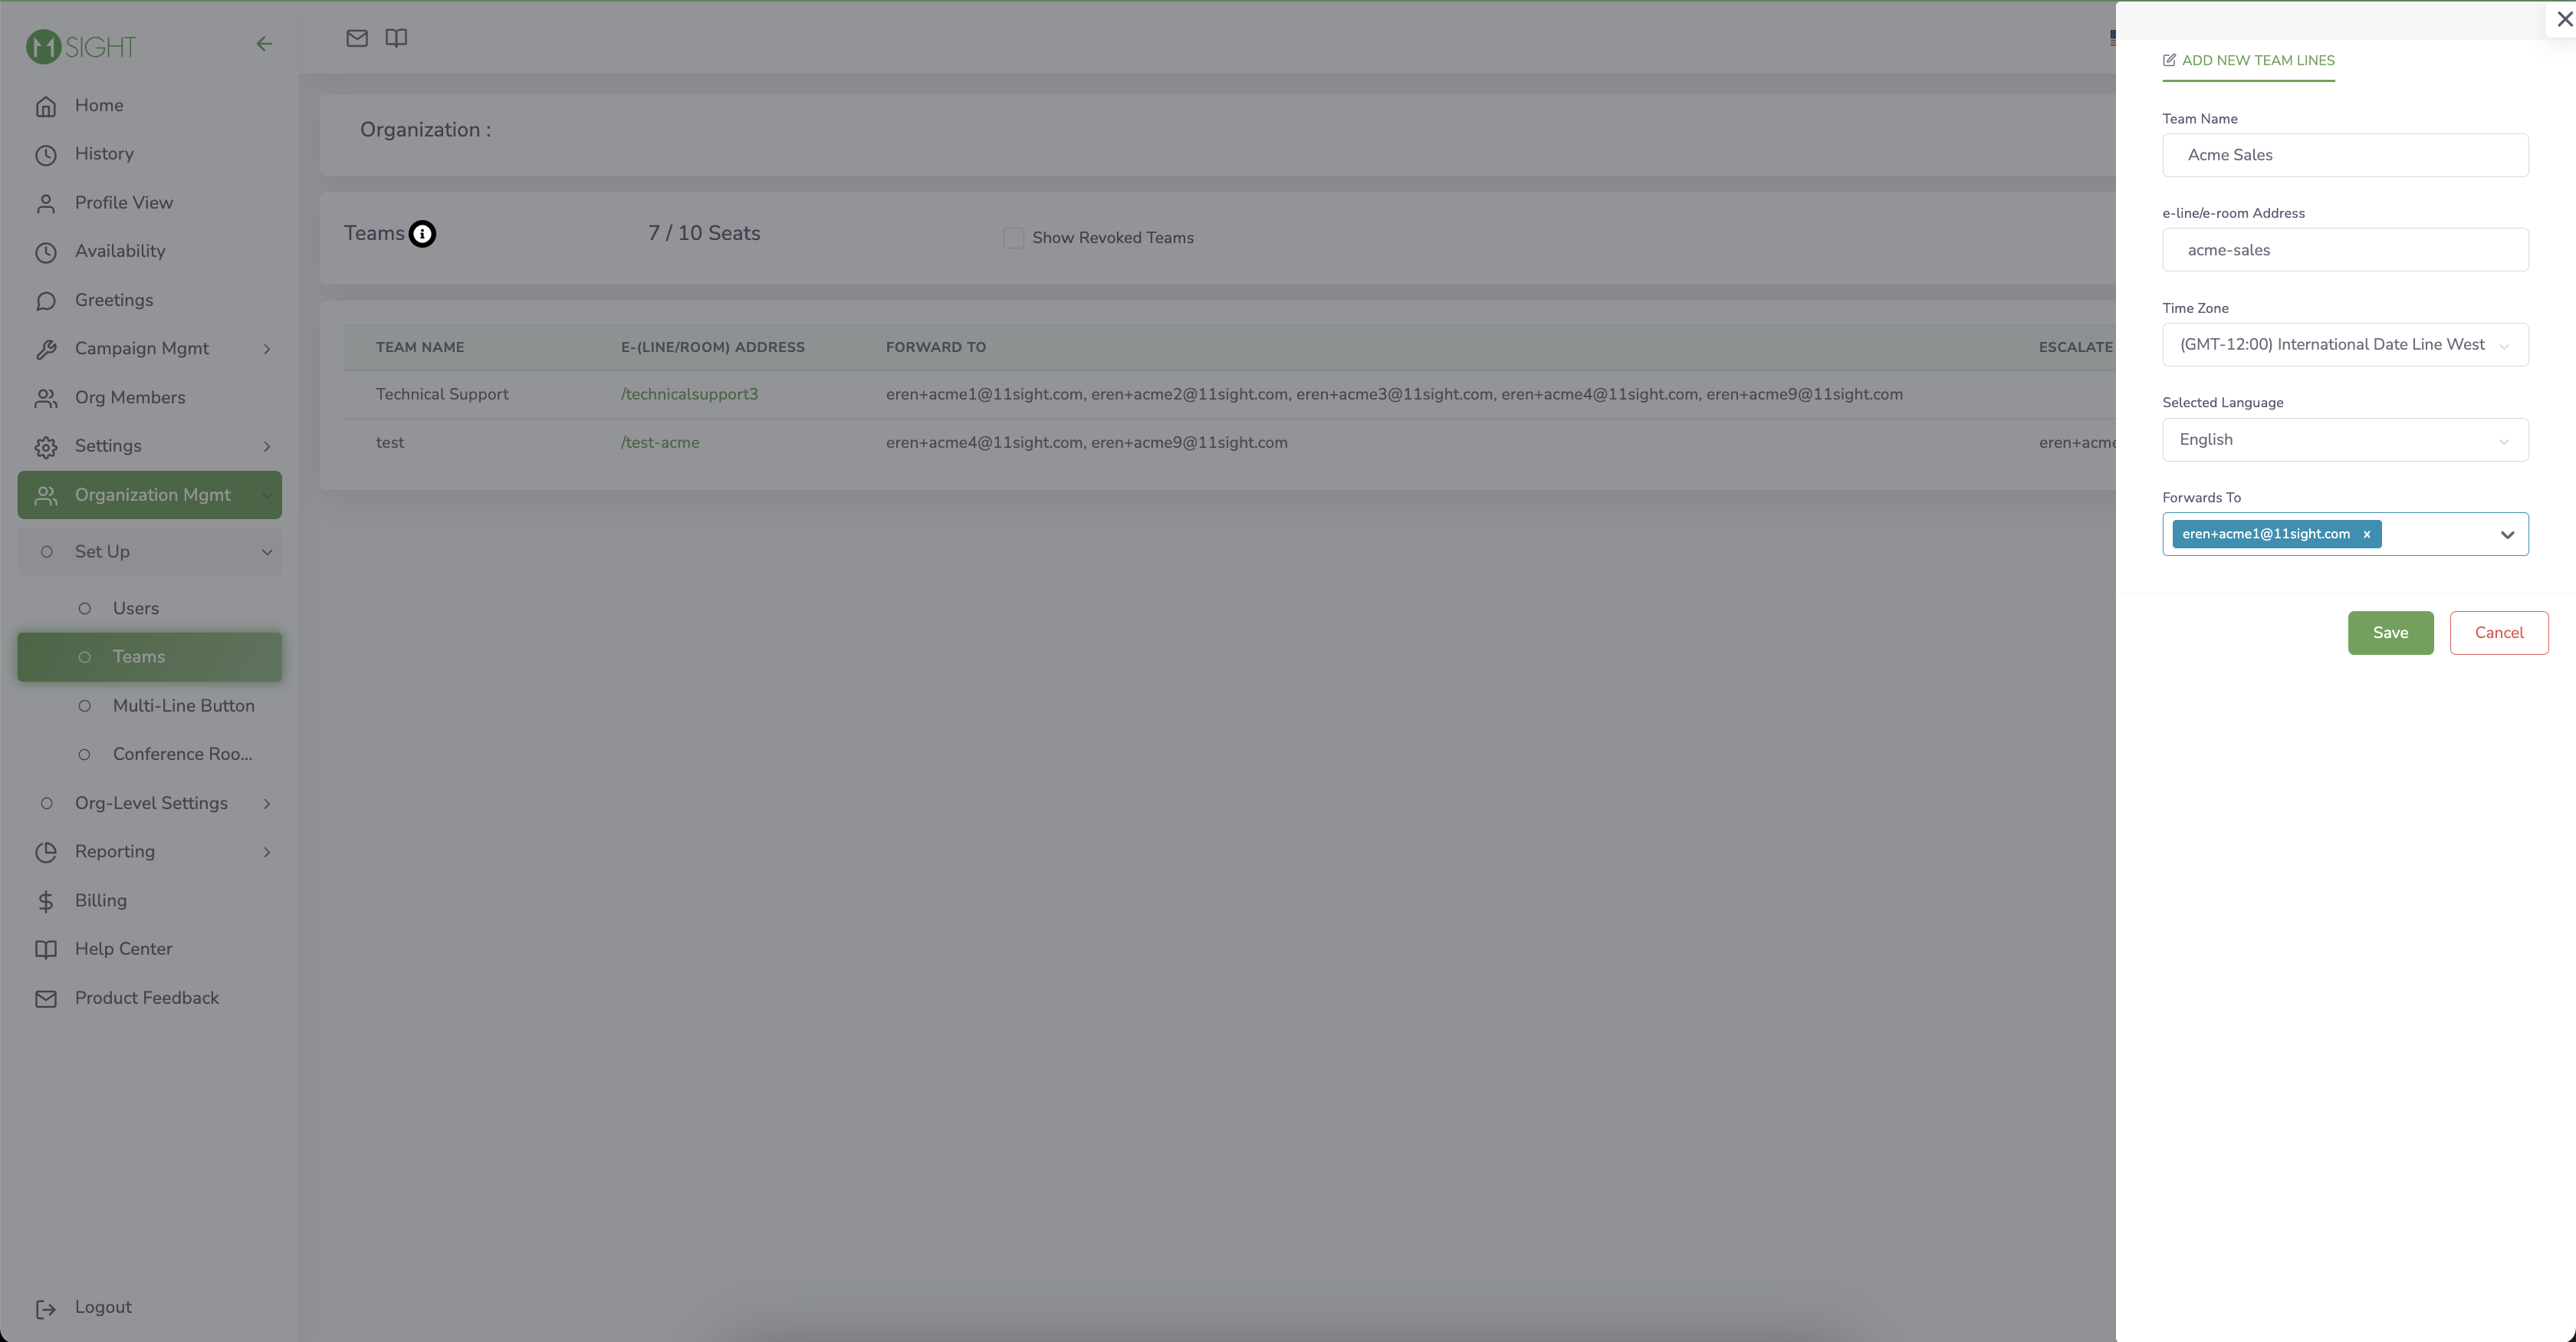
Creating a Team Line
To create a new team in your organization, navigate to Organization Management > Set Up > Teams.
Click “+Add Team Line” to create a team line.
All of the recipients will get the calls at the same time.
Make sure to click “Save” button.
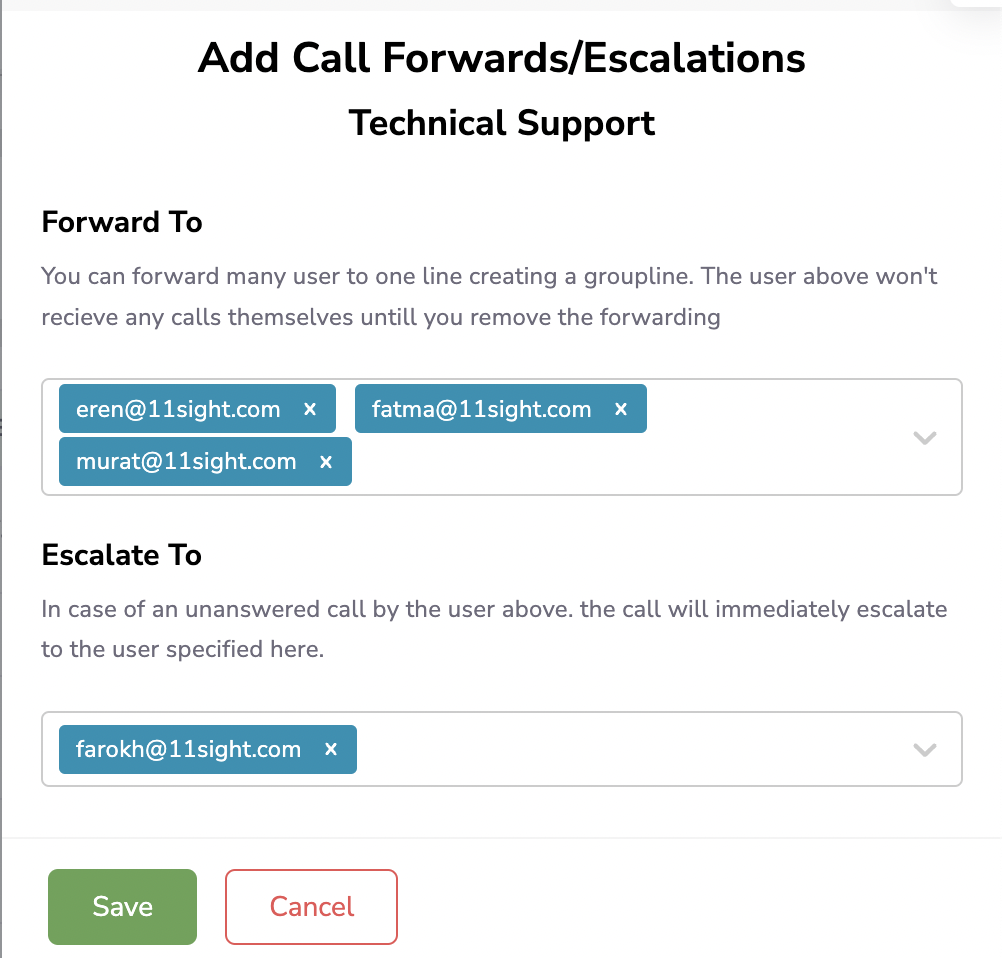
Call Forwarding and Escalation
To set up call forwarding and escalation for a team line click on the escalation icon (1st icon from the left).
Select the users you would like to forward and escalate calls to using their emails.
All forwarded users will receive the incoming call at the same time.
All escalated users will receive the call if it hasn’t been answered within 15 seconds of starting.